brickwall tutorial
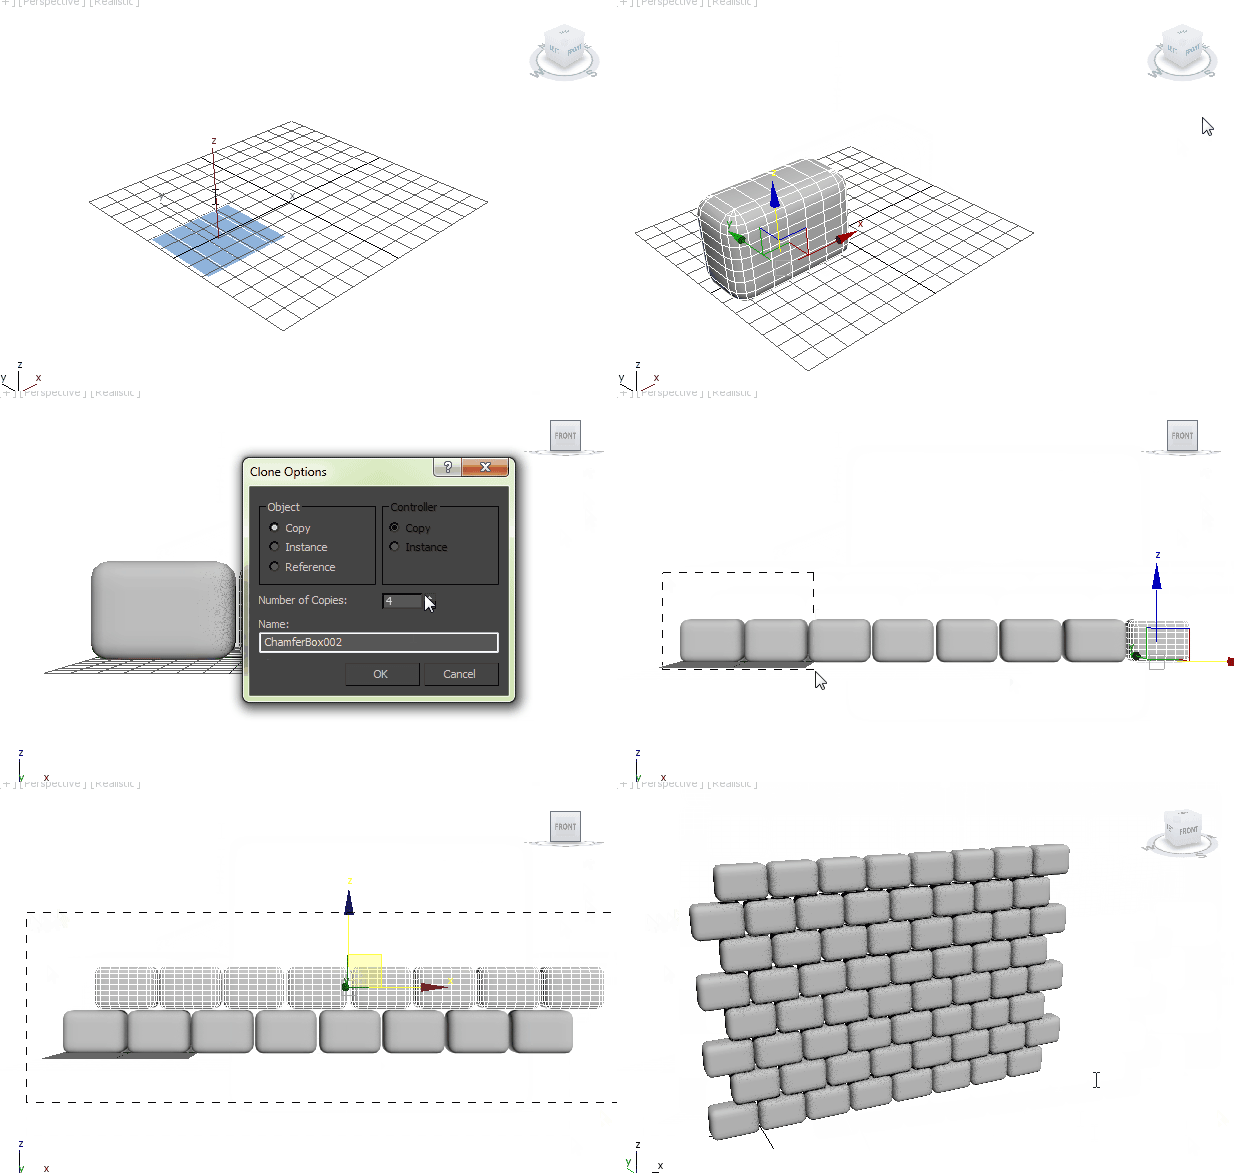
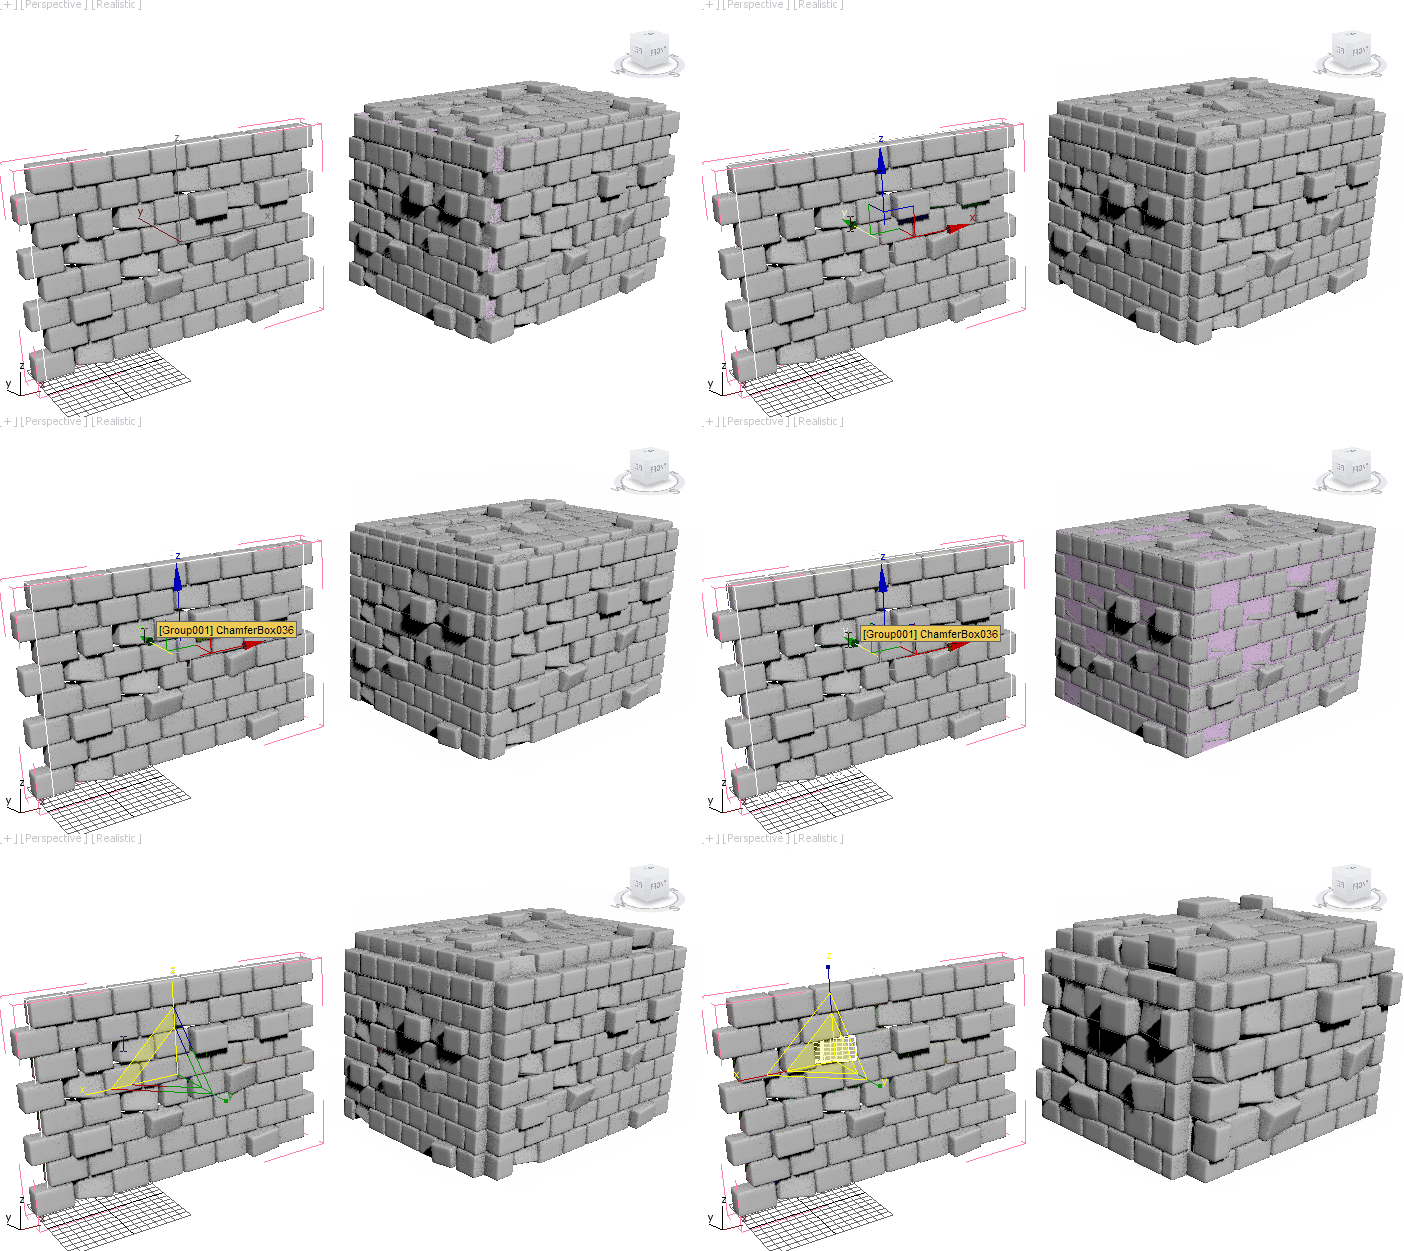
1.Create a couple of chamfer boxes(facing front) with 5x5 width and height segments and arrange them to form a brickwall such as this:
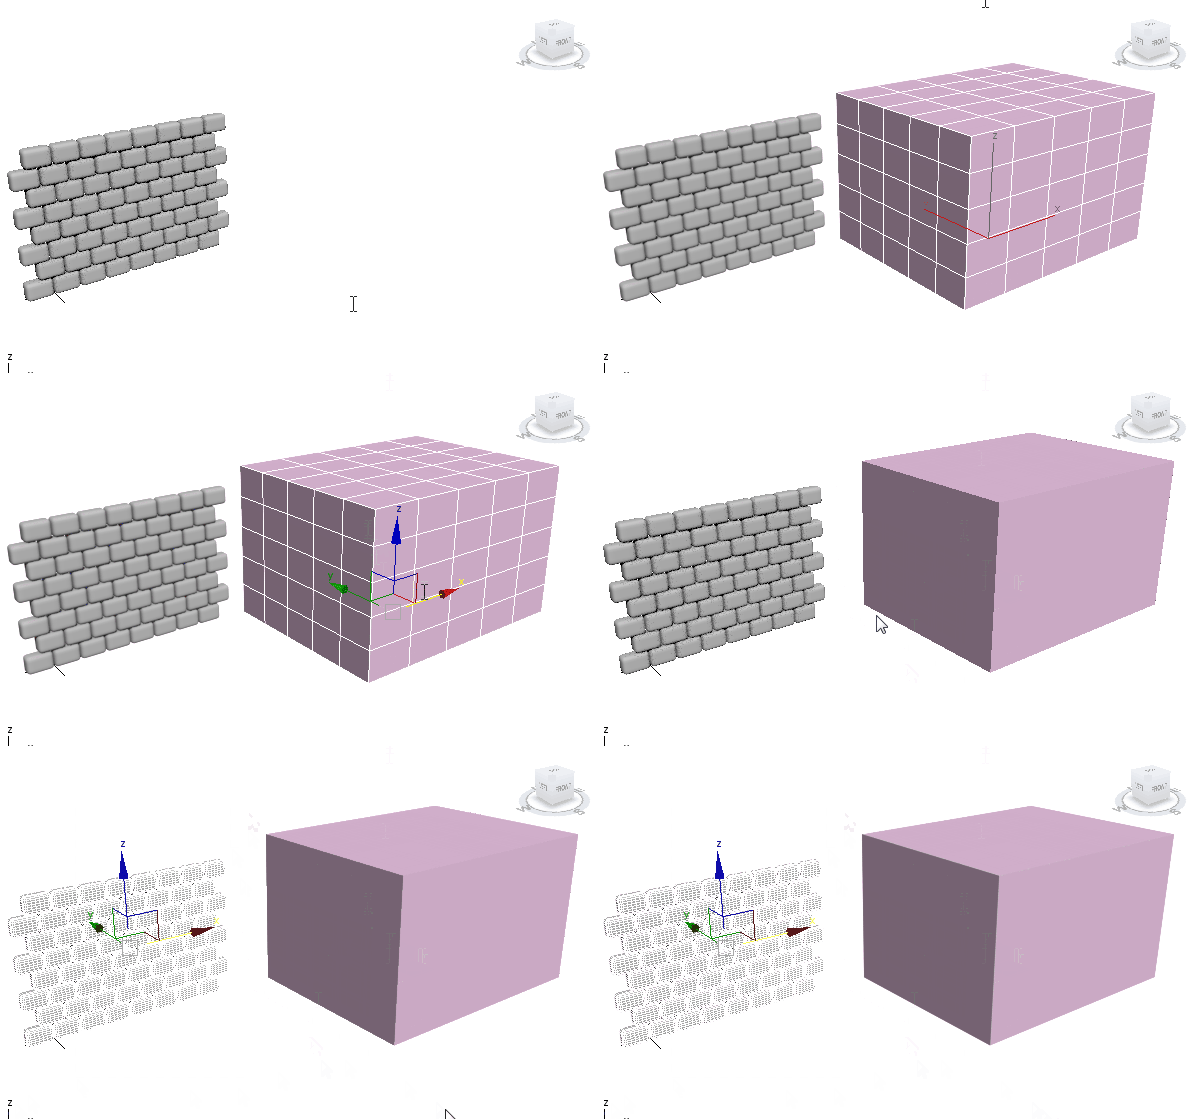
2. Now create a simple (non chamfer) box somewhere in the scene and select all of the previously created chamfer boxes:

3. Once this is done and you have the brickwall selected click on the source button located left on the toolbar ->
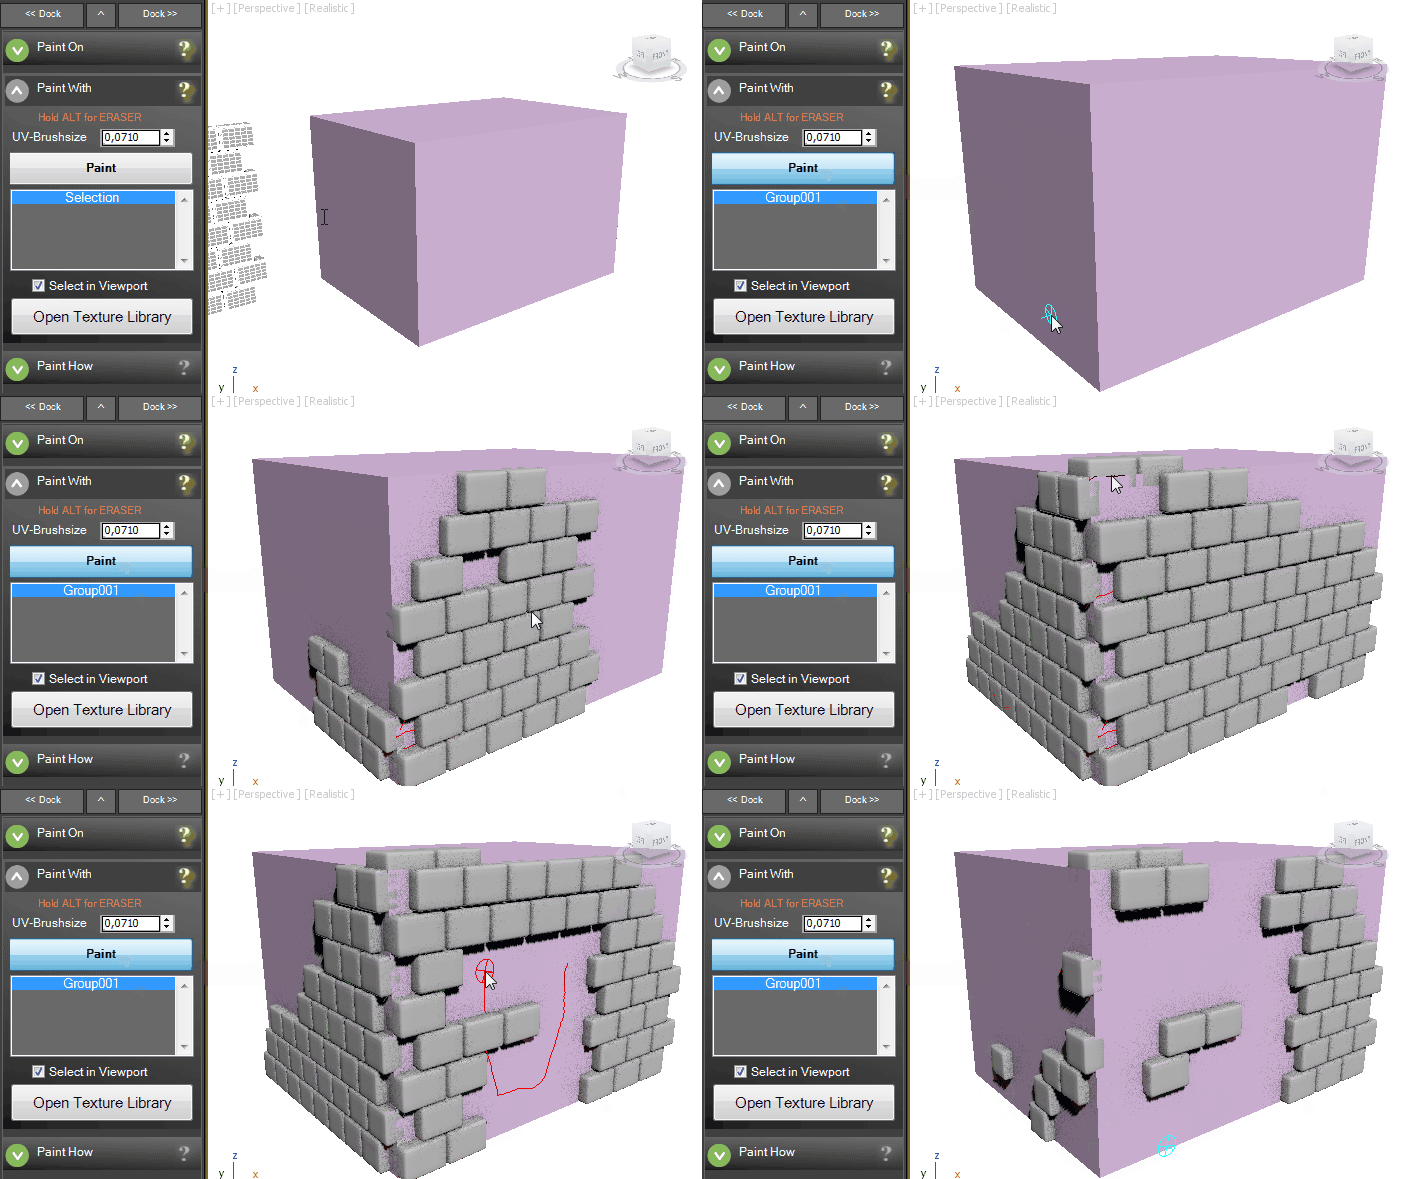
this buttons turns the active selection into a new source. After that click the brush symbol on the toolbar to open the AutoModeller painter and simply click on "Paint". Now you can paint on any object in the scene(including the box) Holding ALT while painting will activate the eraser):
this buttons turns the active selection into a new source. After that click the brush symbol on the toolbar to open the AutoModeller painter and simply click on "Paint". Now you can paint on any object in the scene(including the box) Holding ALT while painting will activate the eraser):
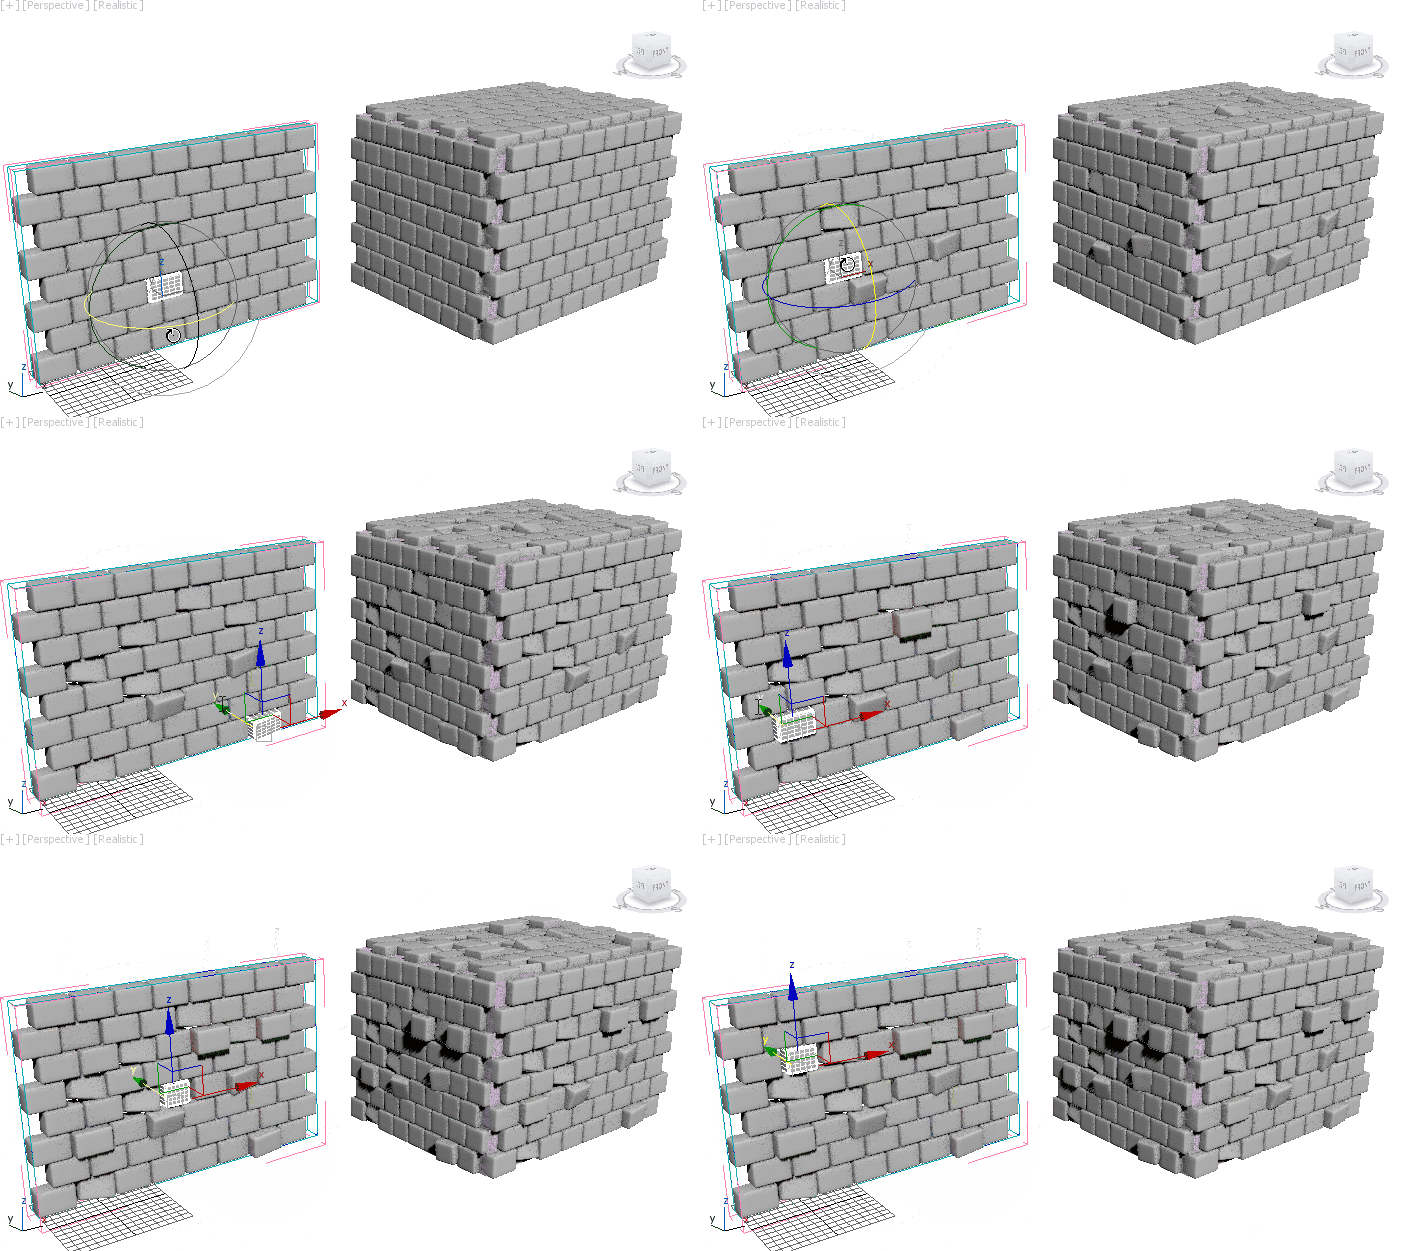
4. To make the appearance of the brickwall a little bit more appealing we can move and rotate the individual bricks and the previous results will automatically update:
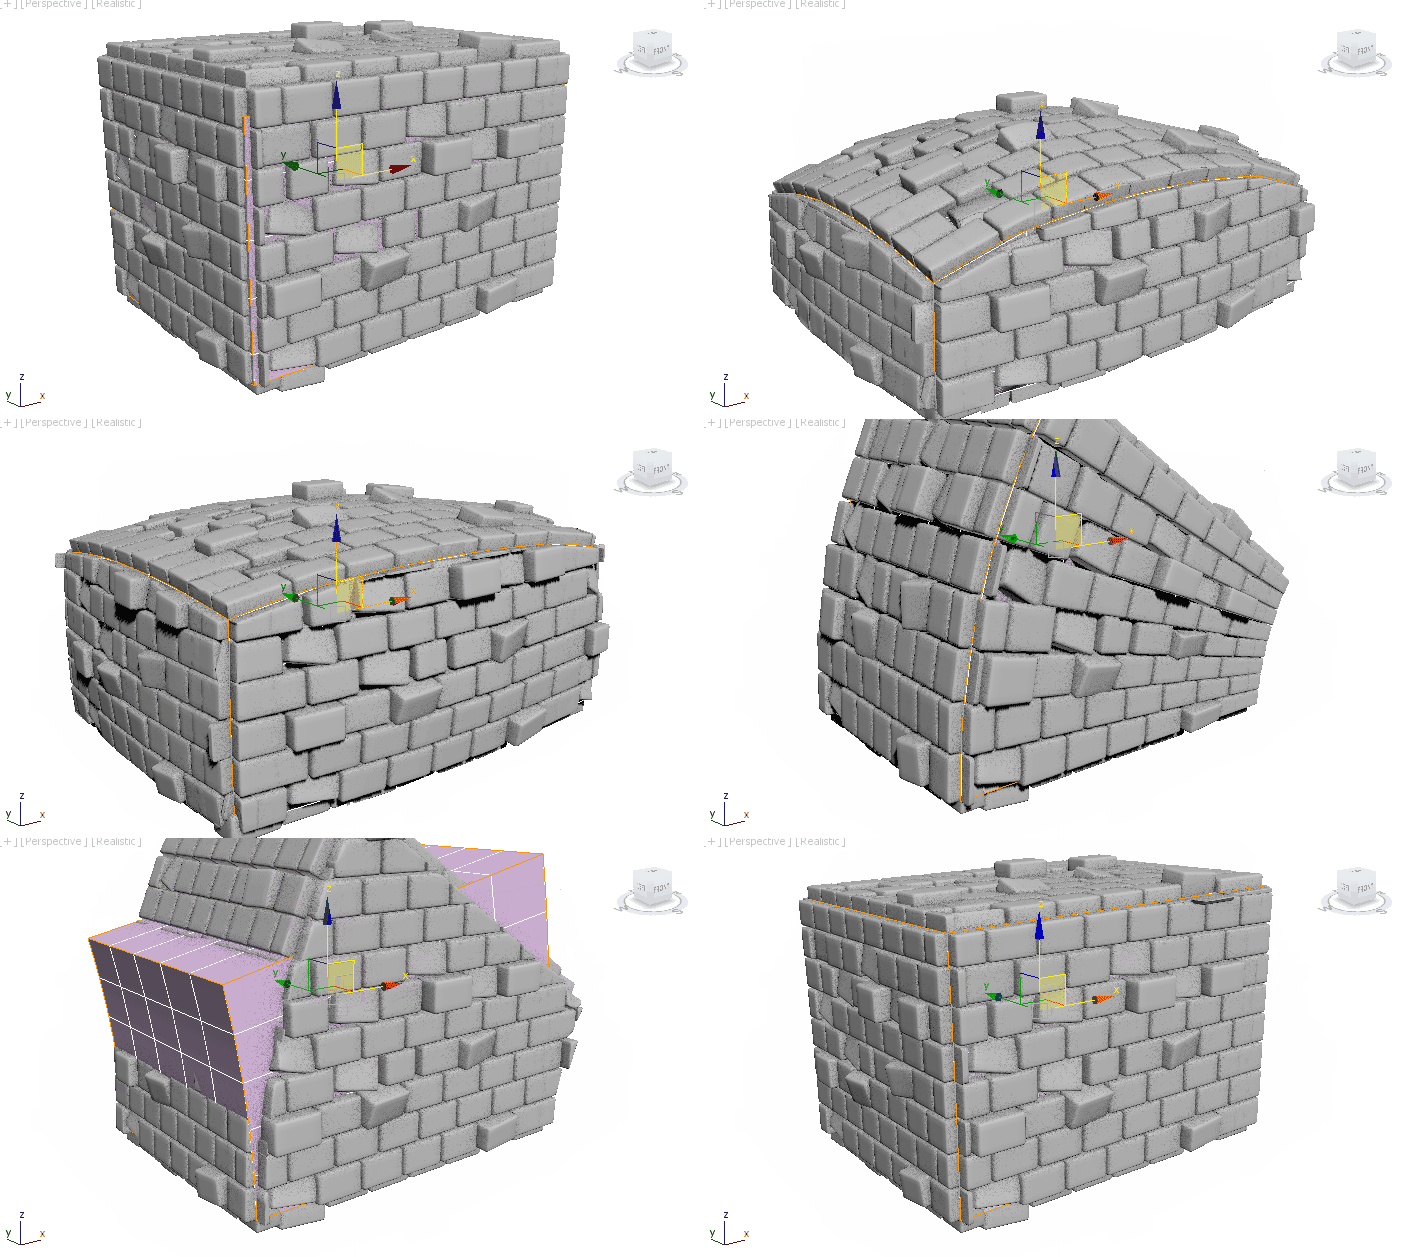
5. Now select the blue "gizmo-box" object. The gizmo object defines which part of the source is mapped onto the surface of the target object. You can move it and scale it around:
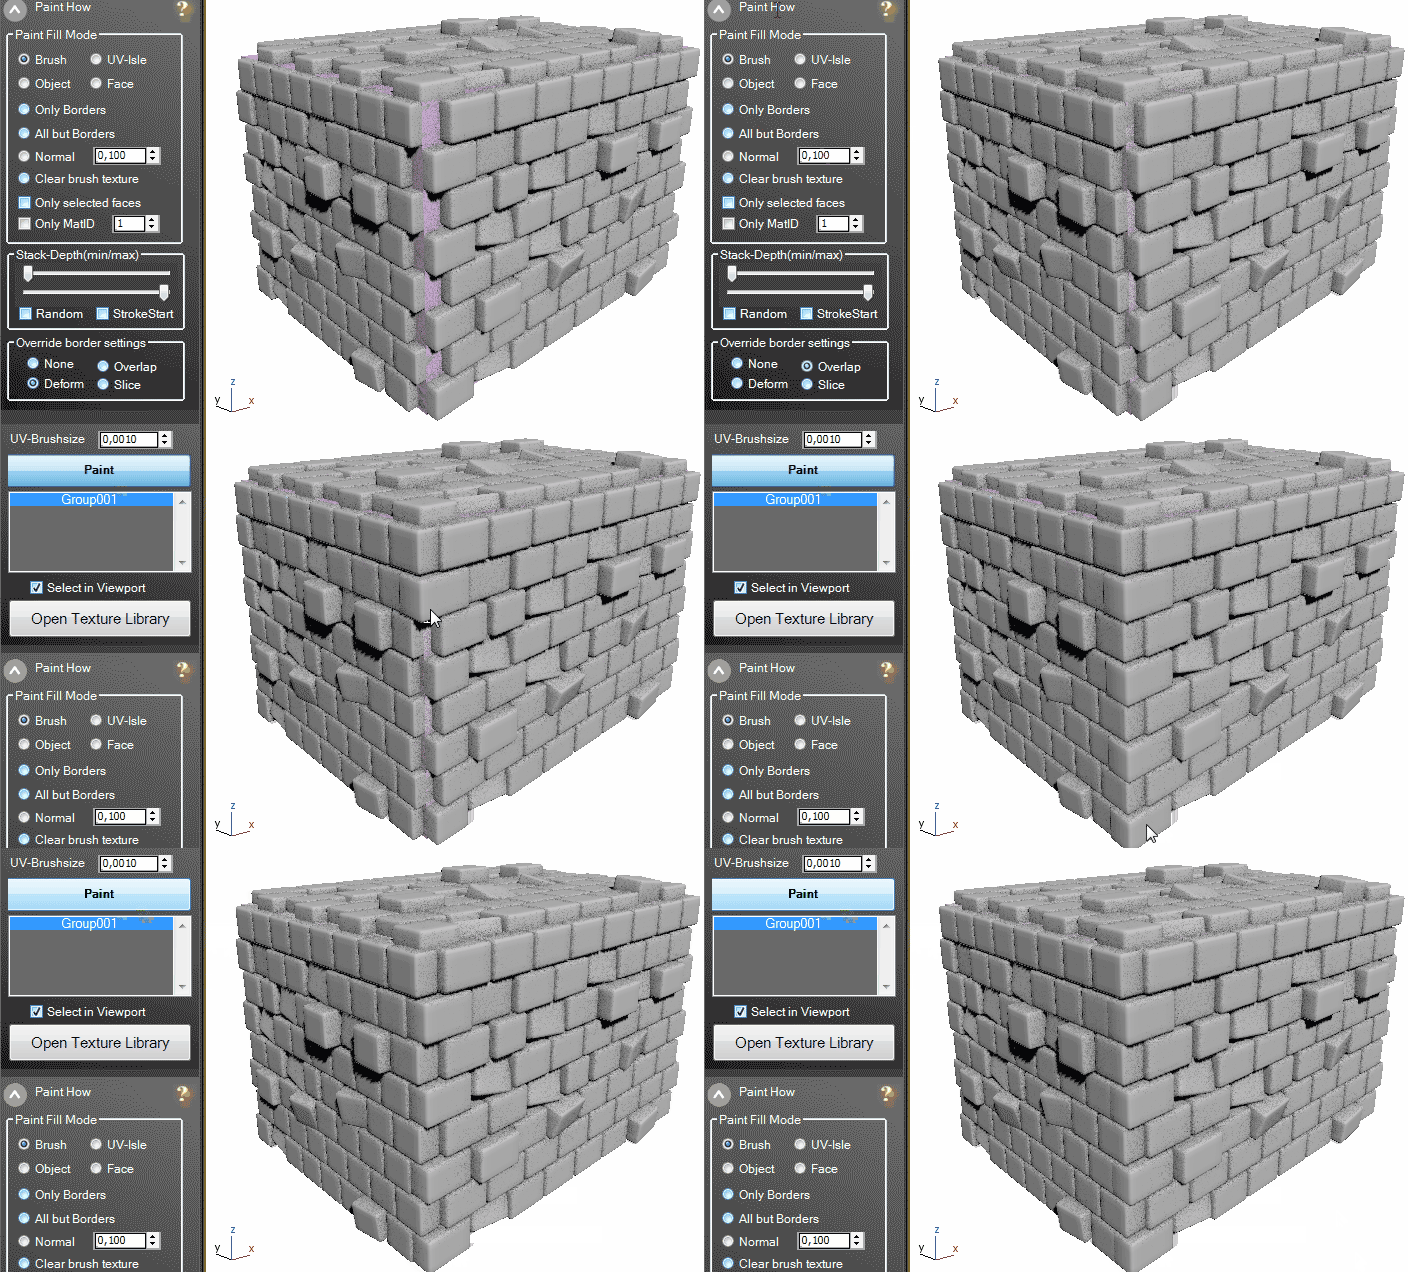
6. In addition to that you can try different border behavior modes OVERLAP,DEFORM and SLICE by either setting them in the Source properties or by using the override switches in the Painter. You can use this to make the brickwall stones interlock using overlap at the edges and use the gizmo to control the amount of interlock like this:
7. You can also apply an UVW map modifier to the box but don't use planar mapping. You can move,scale and rotate the UV-box gizmo:
8. In the following example we added a melt (and bend )modifier to the target object and put an UVWmap box modifier on top of it:
_________________________________________________
Create a free web site with Weebly
